Adding an attachment file
Key Considerations for Sending MMS
Before sending an MMS, review these guidelines to avoid delivery issues and slow broadcast performance.
• Recommended file size: Keep media files at or under 500 KB to avoid image degradation. While the platform does not have a file size limitation, carriers employ their own file size limitations, from 500 KB to around 1 MB. In addition, some user's phones or text messaging apps employ their own file size limits. Use your best judgment and do not upload large files (whether they are GIFs, videos or pictures). The mCommons platform will automatically transcode and reduce the file size of any items uploaded to meet general carrier requirements. But the bigger the file when uploaded, the more transcoding the platform will need to do (meaning it will take longer to upload). Larger files will take a longer time to send to subscribers. Animated GIFs may have frames removed to accommodate creating a small enough file to send to most phones.
For MMS dimensions, we recommend:
• Always test photo/GIF sizes on the latest devices (iPhones, Androids, etc.). There are over 5,500 handsets being used by consumers, so actual results may vary.
• 1080w x 1920h is HD best source quality. Do not put any “content of interest” (logos, text, barcodes) in the top 218 pixels (11.4%) or bottom 150 pixels (7.8%) to make sure no content is cut off in full-screen view/mode.
• Alternate size is 640w x 1138h. This is good for vertical/portrait mode images. Do not put any “content of interest” in top 129 pixels (11.4%) or bottom 89 pixels (7.8%) to make sure no content is cut off in full-screen view/mode.
Alternative sizes to try:
• For horizontal (landscape), we recommend 1,280 pixels wide and 720 pixels high.
• If you don't want important text or "content of interest" to be cut off in the thumbnail image (the image that will be displayed on most phones before an end user taps on the photo):
For Vertical 1080w x 1920h: Do not include important text or content of interest in the top or bottom 268 pixels (14%) and the left or right 86 pixels (8%).
For Horizontal 1920w x 1080h: Do not include important text or content of interest in the top or bottom 86 pixels (8%) and the left or right 172 pixels (9%).
For Vertical 640w x 1138h: Do not include important text or content of interest in the top or bottom 160 pixels (14%) and the left or right 51 pixels (8%).
For Horizontal 1138w x 640h: Do not include important text or content of interest in the top or bottom 51 pixels (8%) and the left or right 102 pixels (9%).
Note: If a subscriber's mobile phone does not support MMS, your opt-in or broadcast message will failover to SMS (short message service) format with a link to the attachment file unless the Suppress SMS failover option is selected.
For attachments:
For more information, see Working with attachments.
Uploading an attachment file
You can attach images and other media in the following file formats to your messages:
-
3GP
- GIF
- JPG
- JPEG
- MP4
- PNG
- VCF - See Sending a contact card (VCF)
To upload an attachment file to your mCommons account:
-
Select
 Text Messaging in the left pane, and then select Attachments.
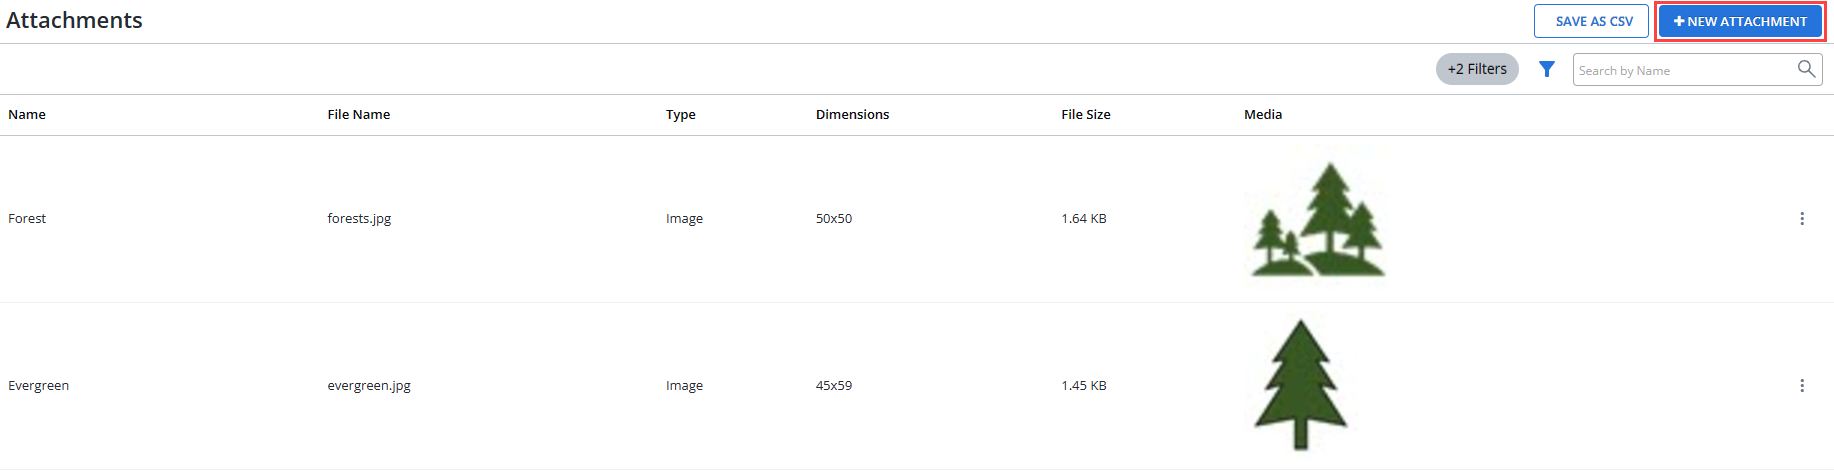
The Attachments table opens.
-
Above the Attachments table, on the right, select + New Attachment.
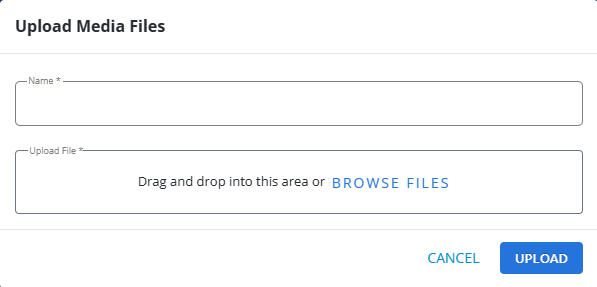
The Upload Media Files page opens.
-
(Required) Enter a name for your attachment.
-
To select the attachment file:
-
Locate the file on your computer, and then drag and drop it into the Upload File box.
-
Select Browse Files, navigate to the attachment file location, and then select Open.
To remove an upload file, select x Remove next to the file name.
-
-
When you are done, select Upload.
Testing an attachment
You can test how an attachment will appear in your text message.
To send a test message containing an attachment:
-
Select
Text Messaging in the left pane, and then select Attachments. -
Locate the attachment in the Attachments table, and select the image link in the Media column.
The attachment page opens.
-
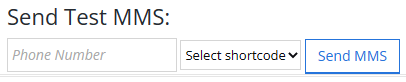
In the Send Test MMS section at the bottom of the form, enter a test mobile number.
The test mobile number must be available in a profile from the mCommons database.
Tip: To send test messages to your mobile phone, create a static profile group containing your mobile phone number. For more information, see Creating a static (uploaded) group and create the group by adding your mobile phone number in the Upload Profiles text box.
-
If more than one short code is available to your company, select the short code from the drop-down list.
-
Select Send MMS.
Editing an attachment name
You can change the required name assigned to an attachment.
To edit an attachment name:
-
Select
Text Messaging in the left pane, and then select Attachments. -
Locate the attachment in the Attachments table, select
 Menu at the end of the row, and then select Edit.
 -
Edit the entry in the Name field.
-
When you are done, select Update.
Archiving an attachment
If you no longer need an attachment, you can archive it.
To archive an attachment:
-
Select
Text Messaging in the left pane, and then select Attachments. -
Above the Attachments table, on the right, select
 Filter.
 -
In the Status list, select Active, and then select Apply.
The Attachments table lists active files only.
-
Locate the attachment in the Attachments table, select
Menu at the end of the row, and then select Delete. The image is removed from the Attachments table but still available from the Archive filter.
Restoring an archived attachment
If you need to use an archived attachment, you can restore it.
To restore an attachment:
-
Select
Text Messaging in the left pane, and then select Attachments. -
Above the Attachments table, on the right, select
Filter. -
In the Status list, select Archived and then select Apply.
The Attachments table lists archived files only.
-
Locate the attachment in the Attachments table, select
Menu at the end of the row, and then select Restore.