Subscriber Conversion report
To access a Subscriber Conversion report:
-
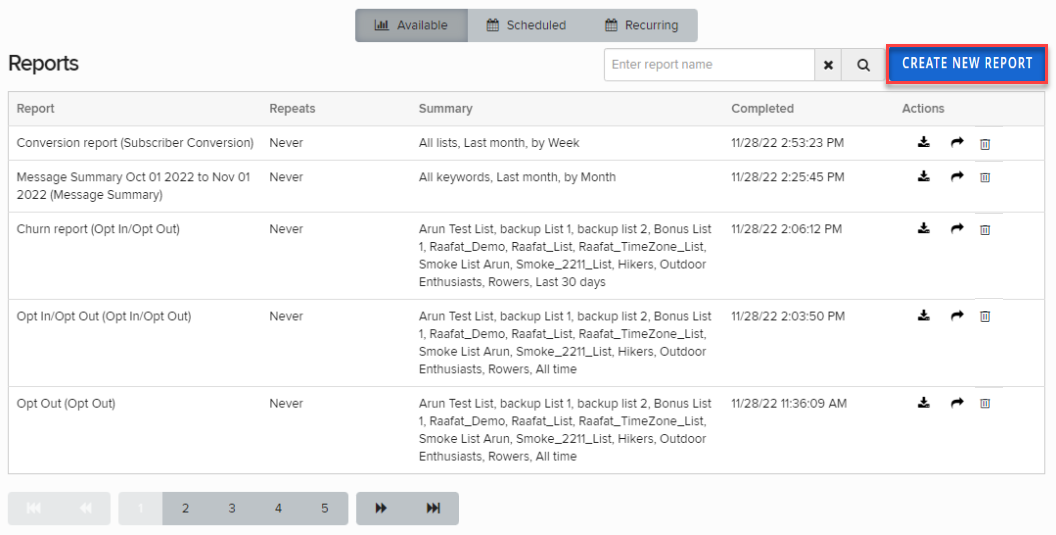
From the Reports menu, select Reports.
The Reports table lists the available reports.
-
Locate the report in the Available Reports table:
-
To search for the report, enter all or part of the campaign name in the Search box at the top of the table, and then select
 Search.
 -
To navigate a multipage Available Reports table, use the pagination bar at the bottom of the table.
-
-
To download an available report in CSV (comma-separated values) format, select
 Download and then select Open file to view the report in a spreadsheet program, such as Microsoft Excel.
The Subscriber Conversion report contains the following information:
-
Date: The date of the report entry
-
Keyword ID: The identifier for the keyword used to opt in
-
Keyword: The keyword used to opt in to this campaign
-
Current Keyword Status: The current status of the keyword, for example, active.
-
Campaign ID: The identifier for the campaign
-
Campaign: The campaign opted in to
-
List ID: The list identifier
-
List: The subscriber list for the campaign
-
Opt-in Initiated: The number of opt-ins that have completed the first step (for example, the subscriber texted the keyword to the short code)
-
Opt-in Completed: The number of opt-ins completed or confirmed (for example, the subscriber completed the double opt-in by replying Y or Yes to the opt-in message)
-
Conversions: The number of completed opt-ins divided by the number of initiated opt-ins
-
Opt-out: The number of subscribers who opted out
Creating a new Subscriber Conversion report
-
From the Reports menu, select Reports.
-
In the upper-right corner, select Create New Report.
-
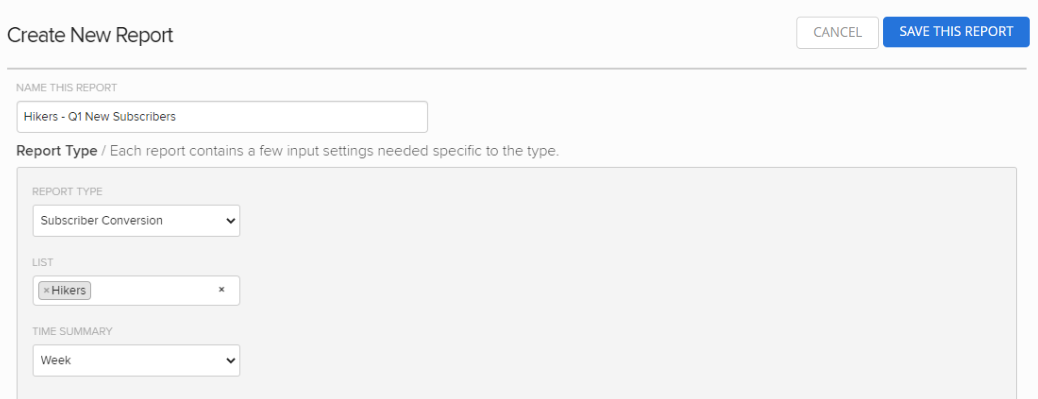
On the Create New Report form, enter a descriptive name for the report.
-
From the Report Type dropdown list, select Subscriber Conversion.
-
From the List dropdown list, retain All or select one or more lists to populate the report.
-
To add another list, select the List field and select a list.
-
To remove a selection, select the List field and reselect it.
-
To clear your selections, select
 Delete.
-
-
From the Time Summary dropdown list, select Day, Week, or Month.
-
In the Report Timeframe section, select a preset time frame for your report data or add a custom time frame:
-
To select a custom timeframe, select Custom. Enter the start and end dates in MM/DD/YYYY format or select
 Calendar and select a date.
 Note: The end date is not included in the report.
-
-
In the Schedule section, select a date and time when the report will be built.
-
In the Frequency of Delivery section, select Never, Daily, Weekly, or Monthly.
Tip: Select Never to hold a report until you are ready to run it.
When the report is ready, it will be available from the Reports table. You can also email a copy directly to yourself or to other recipients.
-
(Optional) In the Recipients section, enter one or more email addresses, separated by a , (comma). Waterfall will send the report to these recipients when it is ready.
-
When you are done, select Save this Report.
The report is added to the Reports table according to its schedule and frequency settings.
