Setting up opt-in messages
The purpose of the opt-in messages is to add new users to your company's messaging campaigns. After a user gives your company permission to send text messages (subscribes), you can continue to send messages that promote your company or organization.
An opt-in message is a two-way conversation with potential new users:
-
Call to action: Your company advertises a short code-keyword combination (call to action) and prompts mobile users to join your list.
The mobile user's initial message is the first opt-in in this two-part process.

-
Confirmation message: When users respond to your call to action, the follow-up message asks them to confirm that they want to receive messages from your company, adding the standard note that they may incur data costs by exchanging text messages.
The mobile user's affirmative response is the second opt-in.

To begin, create a new campaign. The campaign page remains open.
Note: If your campaign has an age requirement, for example, if you are running a contest and the entrants must be 18 years of age or older, use the Age Verification component instead.
From the campaign page:
-
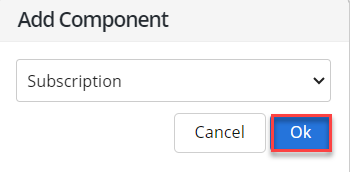
Select Add Component.
-
Select Subscription from the dropdown list, and then select OK.
The Subscription component is added to the panel on the right.
-
Select the Subscription component name to open the form.
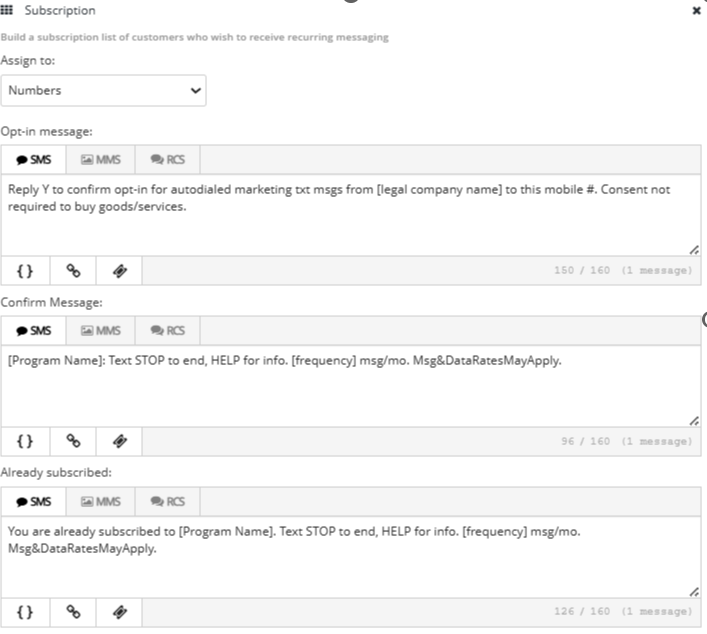
The subscribers to your campaign will be added to your account database, but in order to send messages to them, you must assign them to a list.
-
In the Assign to field:
-
Select an existing list from the dropdown list.
-
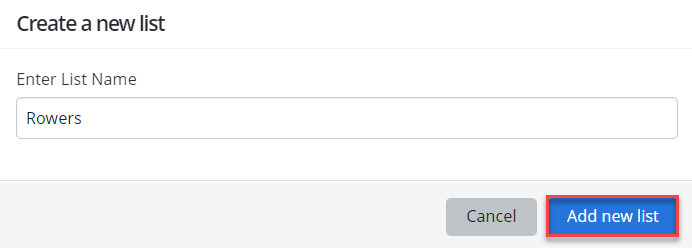
To create a new list, select + Create new list, enter a unique list name, and then select Add new list.
-
-
Enter content for each of the following messages:
-
Opt-in message: Instructions for completing the double opt-in process.
-
Confirm message: Compliance message sent in addition to the opt-in message.
Note: Two messages are sent in response to a new opt-in: the opt-in message and the confirm message.
-
Already subscribed: Message to an existing subscriber, whose mobile phone number is already opted in to your campaign.
-
-
To add a message, select SMS (plain text message), MMS (multimedia message, including images, videos and audio), RCS, for each message, and then enter your message in the text box. For more information on RCS messging, see Using Rich Communication Services (RCS) messaging in Waterfall.
-
 SMS messages
For SMS messages, you can include some or all of the following customizations to add interest to your message:
-
Header (if available): Select
 Header and select one or more identifying details from your log-in account to add to the top of your message:
 -
Name: your first name and last name, if available; if unavailable, your log-in user name
-
Mobile: the mobile number associated with your user name
-
Company (Subaccount): the company or subaccount you are using when you add the header
When you are done, select Apply.
-
-
Dynamic insertion: Select
 Dynamic Insertion and select a metadata field from the dropdown list, then add a default value to display when a value is not available in a subscriber's profile. Select Insert to add the field to your message.
Tip: Adding a default value is highly recommended; otherwise, when a subscriber's profile does not include a value in the selected field, the entry in your message will be blank.
-
Link shortener (if available): Select a URL in your message and then select
 Link Shortener. Select Insert to reduce the character count by adding a shortened link to your message.
 -
Coupon code (if available): Select
 Add Coupon and select a coupon code from the dropdown list. Select Insert to add the code to your message. For more information, see Adding coupon codes.
Note: A simple text message is limited to 160 characters. Check the lower-right corner for the remaining character count. If the number is negative and red, then the message is overlong and may be split and sent as a multipart SMS message.
-
-
MMS messages
For MMS messages, you can include some or all of the following customizations to add interest to your message:
-
Header (if available): Select
Header and select one or more identifying details from your log-in account to add to the top of your message: -
Name: your first name and last name, if available; if unavailable, your log-in user name
-
Mobile: the mobile number associated with your user name
-
Company (Subaccount): the company or subaccount you are using when you add the header
When you are done, select Apply.
-
-
Dynamic insertion: Select
Dynamic Insertion and select a metadata field from the dropdown list, then add a default value to display when a value is not available in a subscriber's profile. Select Insert to add the field to your message.Tip: Adding a default value is highly recommended; otherwise, when a subscriber's profile does not include a value in the selected field, the entry in your message will be blank.
-
Link shortener (if available): Select a URL in your message and then select
Link Shortener. Select Insert to add a shortened link to your message. -
Custom image file: Select
 Image and navigate to locate the image file (.gif, .jfif, .pjpeg, .jpeg, .pjp, .jpg, .png, or .vcf) up to 3 MB. Select Open to add the image to your message.
 -
Custom video file: Select
 Video and navigate to locate the video file (.3gpp, .m4v, .mp4, .mpg, .mpeg, .avi, .wmv, or .mov). Select Open to add the video to your message.
 -
Custom audio file: Select
 Audio and navigate to locate the audio file (.mp3 or.wav). Select Open to add the audio to your message.
 -
vCard file: Select
 vCard and navigate to locate the vCard file (.vcf). Select Open to add the vCard to your message.
 -
Emoji: Select
 Emoji to select an emoji from the catalog.
 -
Coupon code (if available): Select
Add Coupon and select a coupon code from the dropdown list. Select Insert to add the code to your message. For more information, see Adding coupon codes.
Note: If an icon is grayed out, it is unavailable.
Your campaign settings in the panel on the left provide the values for the program name and frequency values fields in the messages.
For information on RCS messaging, see Using Rich Communication Services (RCS) messaging in Waterfall.
-
-
When you are done, select Save Campaign.
-
Continue adding messages to your campaign, or return to the Campaigns table:
-
If your campaign requires information on the subscriber's identity or interests, or if you want to add special offers to new subscribers, continue to add components to this initial conversation.
-
To return to the Campaigns table without adding components, from the Campaigns menu, select Campaigns.
The new campaign has been added to the Campaigns table.

-
Note: MMS messaging is available in the United States and Canada only.