Building a new broadcast
To test your broadcast messaging:
-
Send a preliminary test message to mobile numbers that you supply when you review your message before approving the final copy to send to your subscribers.
-
Send two separate (A/B) test messages to subscribers and analyze the results for future messaging. For more information, see Testing the effectiveness of your messages.
Creating a new broadcast
To create a new broadcast:
-
From the Broadcasts menu, select Send.

-
To define the subscribers who will receive your message, select List or Smart Segment from the dropdown list, and then select a list or smart segment from the adjoining dropdown list.

-
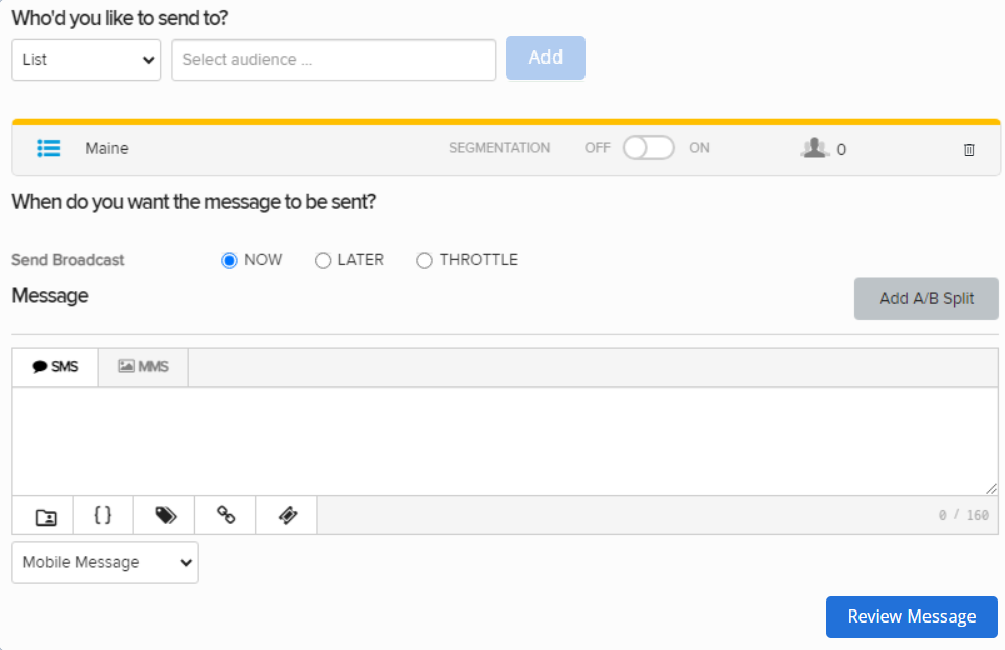
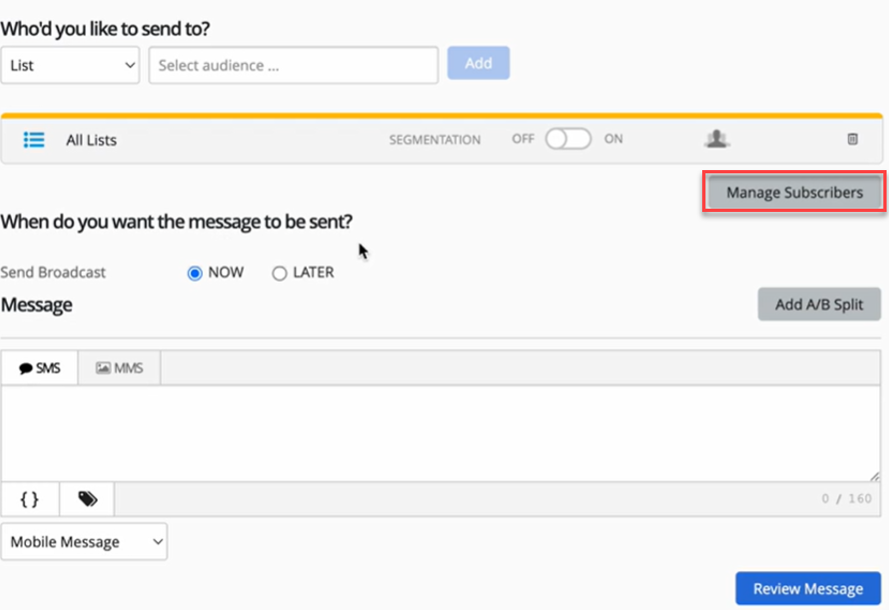
Select Add to open the broadcast form:
 Note: Some features in the screen above will be shown or hidden based on the respective permissions assigned to each user. For more information, see the feature access section below. In the above screen, you will have also access to the Manage Subscribers button (applicable for list only) if it is enabled through Manage Subscribers option under role-based permissions. For more information, see the manage subscribers section.
The broadcast form expands, adding the subscriber group below the List or Smart Segment field. The right panel lists previously sent messages and upcoming scheduled messages.
If you selected a smart segment, the segmentation slider is set to On and the segmentation options are added to the form.
Depending on your audience selection, you can continue to add lists or smart segments, which will stack below the List or Smart Segment field.
Note: You cannot mix lists and smart segments in your audience selection. If you change your selection, you will see a confirmation message. Select Yes to clear the previous selection.
-
Review the list(s) of subscribers who will receive the message.
-
To remove a list or smart segment, select
 Delete at the end of the row.
 -
To refine a group of recipients in a list, drag the Segmentation slider to select ON and then specify the segmentation options for the subscribers in the selected list. For more information, see Building a new smart segment.
-
-
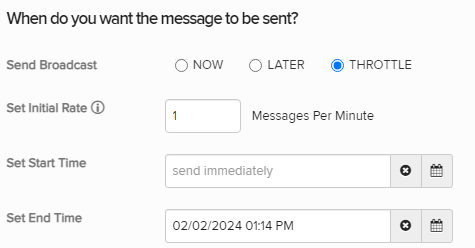
Use the "When do you want the message to be sent?" section to select the broadcast's delivery date:

Note: This option will result in a scheduled broadcast. See Working with scheduled messages for more information.
-
NOW: The broadcast will be sent immediately.
-
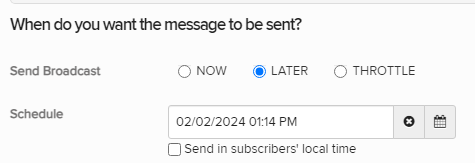
LATER: Use the Schedule field to specify a date and time for the message to be sent:
-
Select
 Calendar and select a date.
 -
Click directly into the text box to manually edit the date or the time.
Note: Leaving the box empty will result in the first message(s) being sent as soon as the Broadcast is finalized.
-
(Optional) Select the Send in subscribers' local time checkbox.
Note: The subscriber's local time is determined by their profile data, including the area code for their mobile phone number. For the US / Canada version of Waterfall, when the"Throttle" option to send broadcast is selected, the option to send in subscribers' local time is not available.
Tip: To reset the send date and time, select
 Clear .
-
-
THROTTLE: Select this option to control and monitor the rate at which messages are sent to recipients. The maximum allowable limit for sending the throttle broadcast is 200,000.

The delivery rate of the broadcast messages will be limited to a specific amount of deliveries per minute.
-
Set Initial Rate: Enter in the maximum number of messages that will be delivered per minute. Once the messages begin to deliver (according to the "Set Start Time" below), no more than the entered number of messages will be delivered each minute. The starting rate may be as low as 1, depending on the time span between the start and end times, as well as the total number of recipients. The maximum rate limit is 2000 messages per minute.This rate will be dynamically recalculated and adjusted based on changes in the start time, end time, and recipient count.
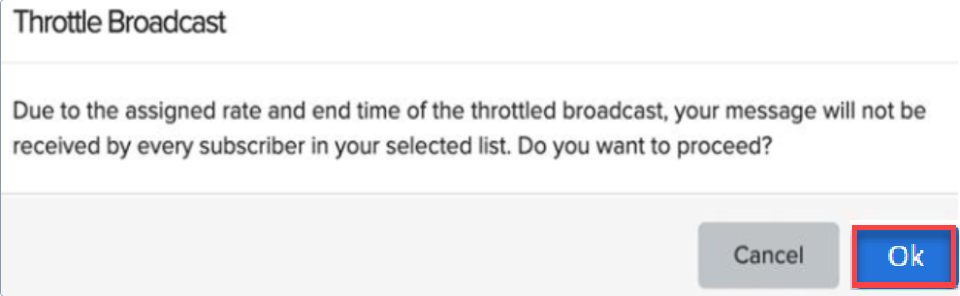
If not all recipients in your chosen list receive the message due to the specified rate and end time of the throttled broadcast, the notification below will be displayed. Click Ok to proceed.
Tip: You can edit the rate at any time after the broadcast is created. See Working with throttled messages for more information.
-
Set Start Time: Select
 Calendar to choose a date for the first message(s) to be delivered. You can manually edit the date and time by selecting the text box.
 -
Set End Time: Select
Calendar to choose a date for message(s) to no longer be delivered. You can manually edit the date and time by selecting the text box.Note: Even if certain intended contacts have not yet received the broadcast, messages will no longer be sent after the end time.
-
The initial end time is set to 12 hours from the start time. If the start time and the end time falls under the designated quiet hours, a warning message displays as below on the “Review Message” page.

-
-
To test your message using A/B test groups, select Add A/B Split. For more information, see Testing the effectiveness of your messages.
-
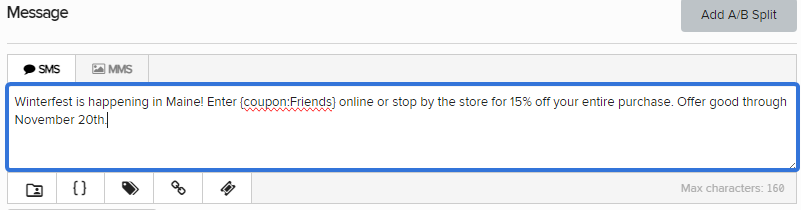
Select the textbox to enter your broadcast message:
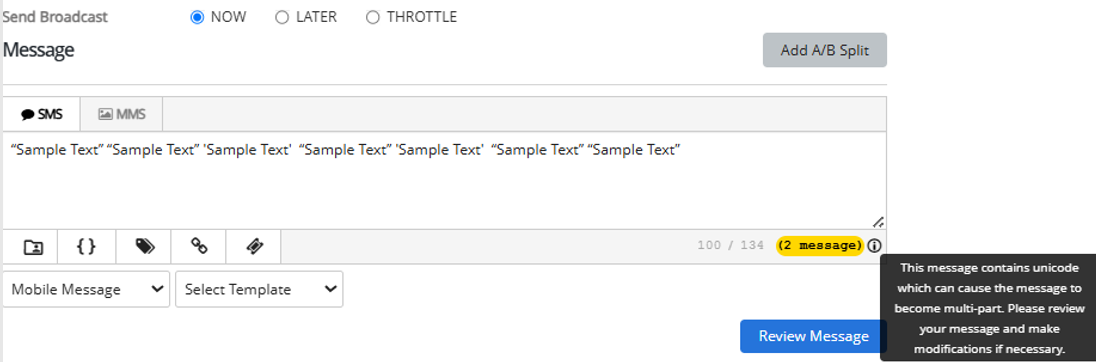
Note: If a message includes special characters or Unicode, it may be sent as a multipart message when the character limit decreases from 160 to 70. If the message remains under 70 characters, it will be sent as a single message.
If a message contains any Unicode characters, the message count is highlighted along with a
 tooltip icon, which, when hovered over, displays the following message.
"This message contains Unicode which can cause the message to become multi-part. Please review your message and make modifications if necessary."
If a message does not contain Unicode characters (a normal message), the message count is not highlighted.
OR
To base your message on a standard broadcast template, under the text box, select a template from the Select Template drop-down list. The message is added to the text box and you can edit it as needed. For more information, see Working with templates.
-
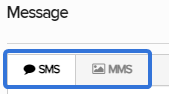
Select SMS (plain text message) or MMS (multimedia message, including images, videos and audio) for the message, and then enter or edit your message in the text box.
Tip: Be sure to add the opt-out disclosure (for example, "Reply STOP 2 quit") to your broadcast message.
Note: MMS messaging is available in the United States and Canada only.
-
 SMS messages
For SMS messages, you can include some or all of the following customizations to add interest to your message:
-
Header (if available): Select
 Header and select one or more identifying details from your log-in account to add to the top of your message:
 -
Name: your first name and last name, if available; if unavailable, your log-in user name
-
Mobile: the mobile number associated with your user name
-
Company (Subaccount): the company or subaccount you are using when you add the header
When you are done, select Apply.
-
-
Dynamic insertion: Select
 Dynamic Insertion and select a metadata field from the dropdown list, then add a default value to display when a value is not available in a subscriber's profile. Select Insert to add the field to your message.
Tip: Adding a default value is highly recommended; otherwise, when a subscriber's profile does not include a value in the selected field, the entry in your message will be blank.
-
Tag metadata: Select
 Tag metadata and select a metadata field from the dropdown list. Specify a static or dynamic value for the metadata field:
-
To specify a static value, enter a value in the Metadata tag field.
-
To specify a dynamic value, enter one of the following tokens in the Metadata tag field:
-
$keyword: the keyword texted by the user
-
$MM$dd$yyyy: today's date
-
$inc: the value in a number field plus 1
-
$dec: the value in a number field minus 1
-
-
-
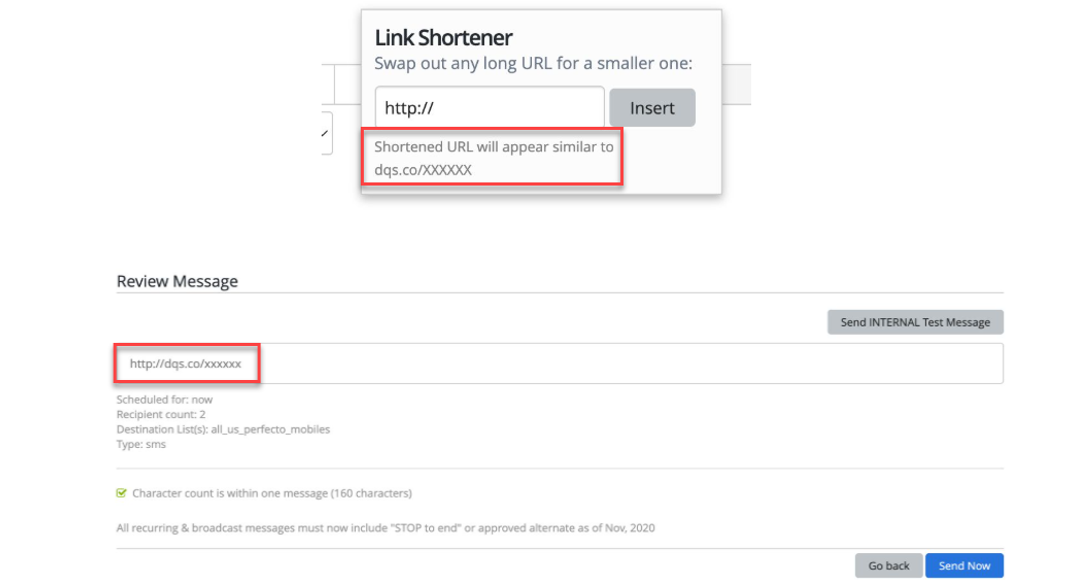
Link shortener (if available): Select a URL in your message and then select
 Link Shortener. Select Insert to reduce the character count by adding a shortened link to your message.
For the US Waterfall platform, dqs.co is the short domain for shortened URLs. For example, the shortened URL will appear as http://dqs.co/xxxxxxx.
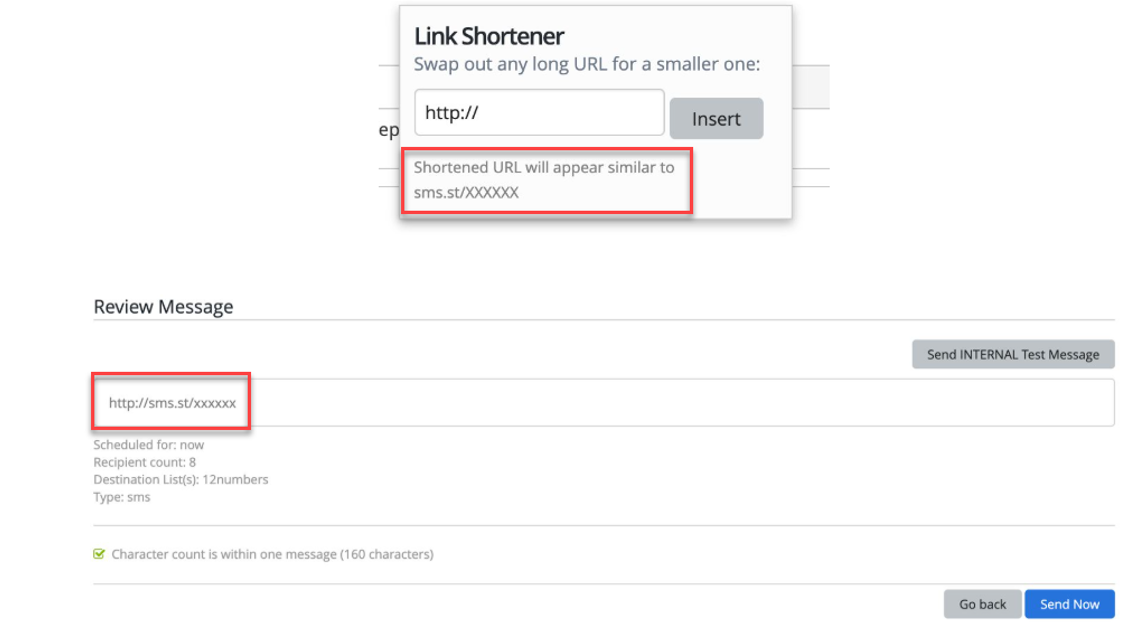
For the UK Waterfall platform, sms.st is the short domain for shortened URLs. For example, the shortened URL will appear as http://sms.st/xxxxxxx.
-
Coupon code (if available): Select
 Add Coupon and select a coupon code from the dropdown list. Select Insert to add the code to your message. For more information, see Adding coupon codes.
When you are done, select OK.
Note: A simple text message is limited to 160 characters. Check the lower-right corner for the remaining character count. If the number is negative and red, then the message is overlong and may be split and sent as a multipart SMS message.
-
-
MMS messages
For MMS messages, you can include some or all of the following customizations to add interest to your message:
-
Header (if available): Select
Header and select one or more identifying details from your log-in account to add to the top of your message: -
Name: your first name and last name, if available; if unavailable, your log-in user name
-
Mobile: the mobile number associated with your user name
-
Company (Subaccount): the company or subaccount you are using when you add the header
When you are done, select Apply.
-
-
Dynamic insertion: Select
Dynamic Insertion and select a metadata field from the dropdown list, then add a default value to display when a value is not available in a subscriber's profile. Select Insert to add the field to your message.Tip: Adding a default value is highly recommended; otherwise, when a subscriber's profile does not include a value in the selected field, the entry in your message will be blank.
-
Tag metadata: Select
Tag Metadata and select a metadata field from the dropdown list. Specify a static or dynamic value for the metadata field:-
To specify a static value, enter a value in the Metadata tag field.
-
To specify a dynamic value, enter one of the following tokens in the Metadata tag field:
-
$keyword: the keyword texted by the user
-
$MM$dd$yyyy: today's date
-
$inc: the value in a number field plus 1
-
$dec: the value in a number field minus 1
-
When you are done, select OK.
-
-
Link shortener (if available): Select a URL in your message and then select
Link Shortener. Select Insert to add a shortened link to your message. -
Custom image file - Select
 Image and navigate to locate the image file (.gif, .jfif, .pjpeg, .jpeg, .pjp, .jpg, .png, or .vcf) up to 3 MB. Select Open to add the image to your message.
 -
Custom video file: Select
 Video and navigate to locate the video file (.3gpp, .m4v, .mp4, .mpg, .mpeg, .avi, .wmv, or .mov). Select Open to add the video to your message.
 -
Custom audio file: Select
 Audio and navigate to locate the audio file (.mp3 or.wav). Select Open to add the audio to your message.
 -
vCard file: Select
 vCard and navigate to locate the vCard file (.vcf). Select Open to add the vCard to your message.
 -
Emoji: Select
 Emoji to select an emoji from the catalog.
 -
Coupon code (if available): Select
Add Coupon and select a coupon code from the dropdown list. Select Insert to add the code to your message. For more information, see Adding coupon codes.
-
-
-
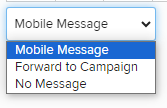
Select a messaging option from the dropdown list:
-
Mobile Message sends the SMS or MMS message to the specified recipient list according to the schedule you select.
-
Forward to campaign sends the SMS or MMS message as part of the campaign you select from the dropdown list. Use this option when you require a response or multiple messages.
-
No message grays out the message box, so you cannot add a message. Use this option to do the following without sending a message:
-
Tag smart segments with metadata values.
-
Generate counts of users in smart segments.
-
Define audience criteria and A/B groups.
-
-
-
When you are done, select Review Message.
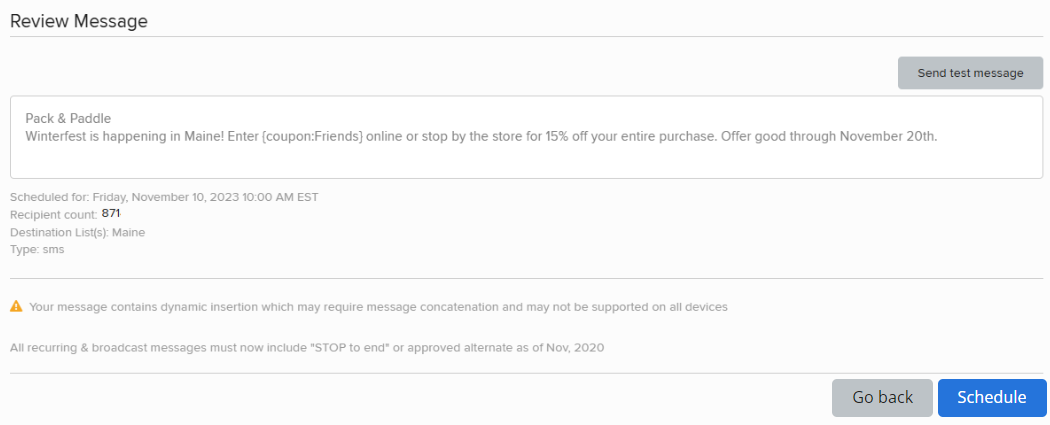
You see a preview of your message, plus the schedule for sending, number of recipients, and guidance on improvements you may want to make.
Note: If you have added a header, the details you selected (name, mobile, and/or company) appear at the top of the message.
-
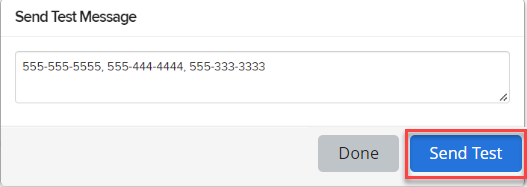
(Recommended) Select Send test message, and enter one or more mobile numbers, separated by , (comma), and then select Send Test.
-
When you see a notification that the test message has been sent, select Done. Review your test message on your mobile device(s).
-
To continue working on your message, select Go Back, make final revisions to your message, schedule, and recipient list, and then select Review Message to double-check your changes.
-
When you are satisfied with your message, select Send Now or Schedule.
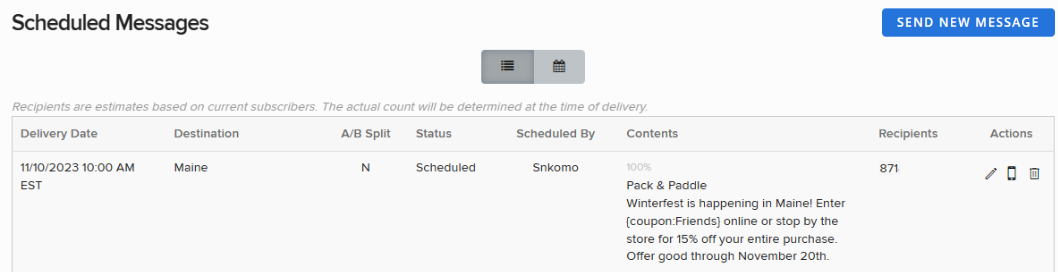
Your message is sent immediately or added to the Scheduled Messages table until it is sent.
Feature access
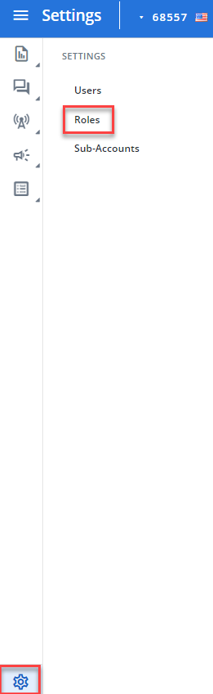
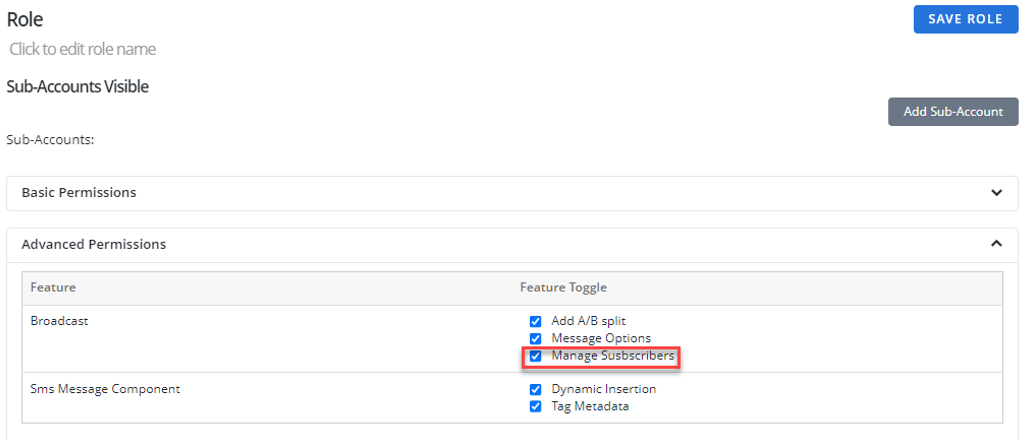
To control which features are visible or accessible, they can be configured in the "Roles" page. Go to Settings > Roles. Here, you can assign or restrict access based on specific roles to ensure that only authorized users can view or interact with certain features on the broadcast page.
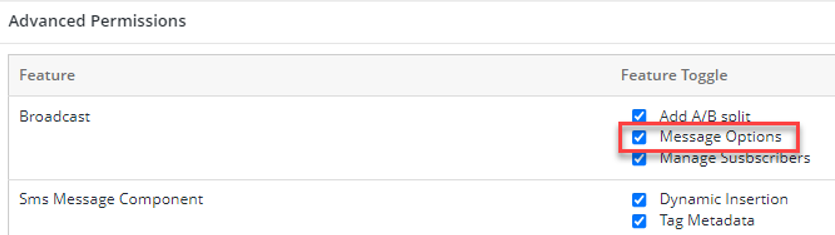
The features (add A/B split, dynamic insertion, tag metadata, link shortener, add coupon) highlighted in the screen below will not be visible if you do not have the required access permissions. These features will be shown or hidden based on the respective permissions assigned to each user.

Manage Subscribers (applicable only for list)
When you're working on the broadcast screen and sending a broadcast, you will have access to the Manage Subscribers button.
This button needs to be enabled through Manage Subscribers option under role-based permissions.
When you click the Manage Subscribers button, a modal will open, allowing you to add subscribers. In this modal, you can search for subscribers by entering their first or last name in the search box. Once you initiate the search, matching subscribers will appear in the dropdown list. The search uses an exact match, so if you search for "Lee," it will display all variations such as Lee/lee/LEE.
You can also search for subscribers using partial terms. When you enter any part of a subscriber's name into the search box and click  Search, the relevant results will be displayed that match your input.
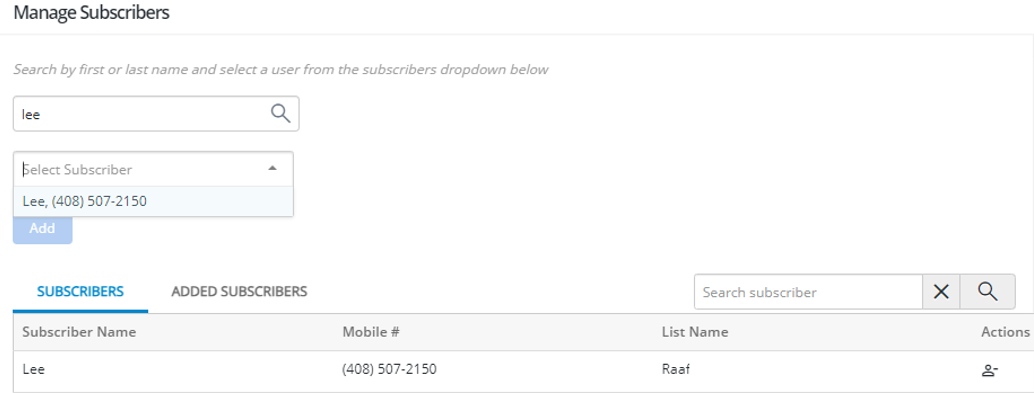
After selecting a subscriber, click Add to include them in the list, and the table below will update to show the subscriber's name, number, and list name.
 Exclude is available beside each subscriber in the Subscribers table. Clicking Exclude will remove the subscriber from the current broadcast, grey out their entry, and change the icon to
  Add. If you decide to re-add the subscriber, click Add, and they will be restored to the broadcast. The added subscriber will be added to the Added Subscribers list.
The number of subscribers in the list is dynamically updated each time a subscriber is added or removed. This ensures that the subscriber count always reflects the most current status of your broadcast list.
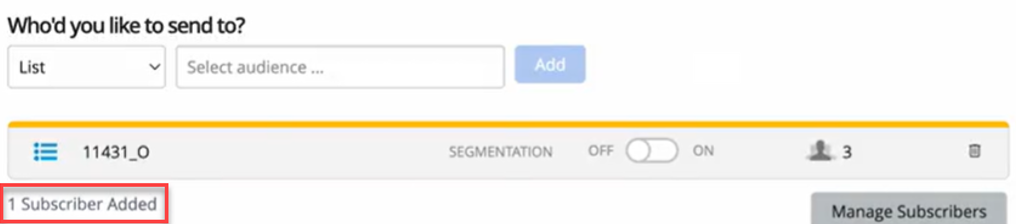
When you add any adhoc subscribers, the count will be displayed on the broadcast screen. Similarly, if you remove an adhoc added subscriber, the count will update accordingly.
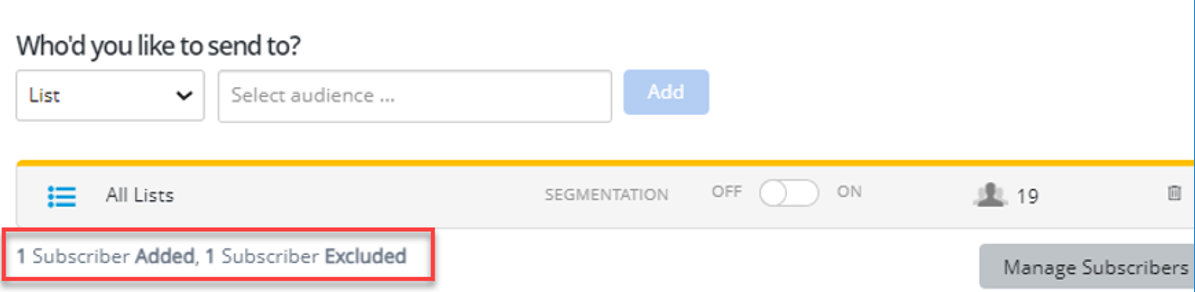
For example, if there is a subscriber (X) already added in the “Added Subscribers” table and a user adds a new list in which this subscriber (X) is present, then the subscriber(X) moves to the main “Subscribers” table. The count will adjust based on the remaining subscribers in the "Added Subscribers" list.
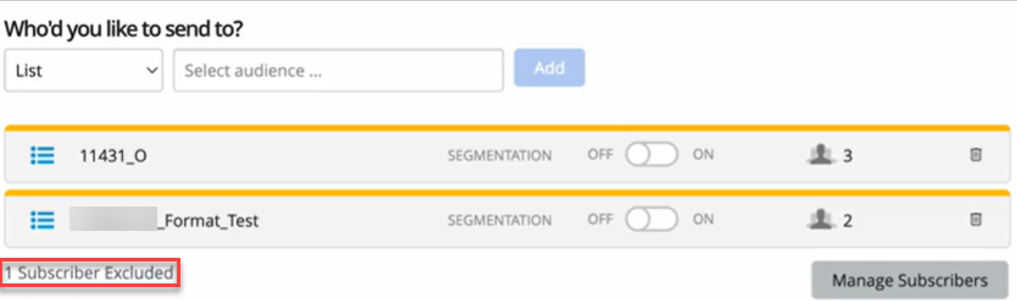
When you exclude a subscriber from the "Subscribers" table, the updated count will be visible on the broadcast screen. If you remove a list that already contains an excluded subscriber, then all subscribers in that list, including the excluded ones, will be removed from the "Subscribers" table. The count will update accordingly.
In the Added Subscriber table,  Delete is available for each subscriber. Clicking Delete will remove the subscriber from the broadcast.
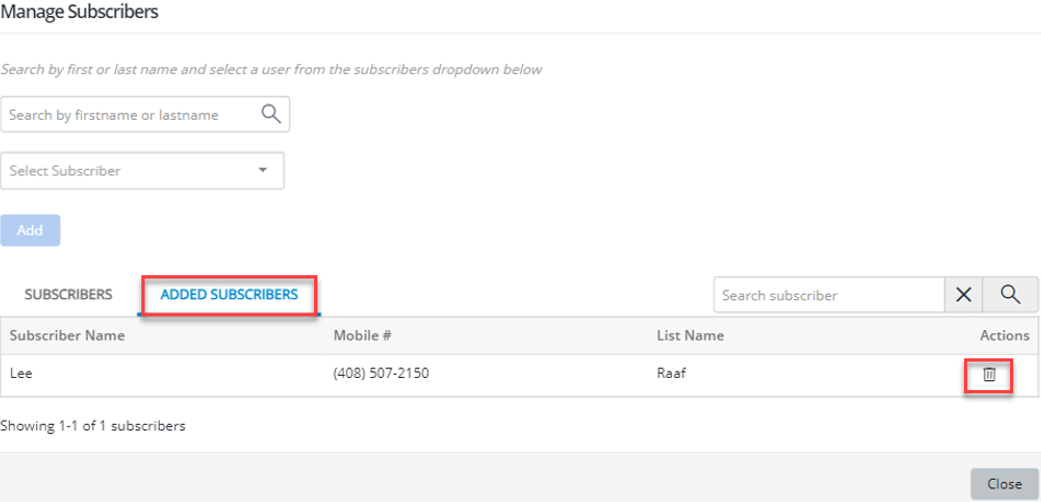
The search functionality allows you to find users by entering either their name or phone number. You can also search for subscribers using partial terms. When you enter any part of a subscriber's name into the search box and click Search, the relevant results will be displayed that match your input.

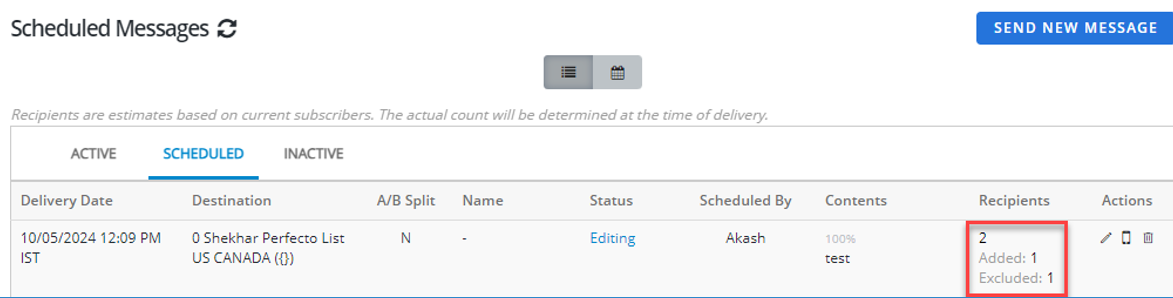
When you're working with a broadcast and you add or remove a subscriber using the Manage Subscribers button, the updated count of added or excluded subscribers will be visible next to the Manage Subscribers button. This ensures you can easily track the number of subscribers as you make changes.
The added and excluded subscribers are also displayed in the Recipients column of the broadcast Scheduled tab.